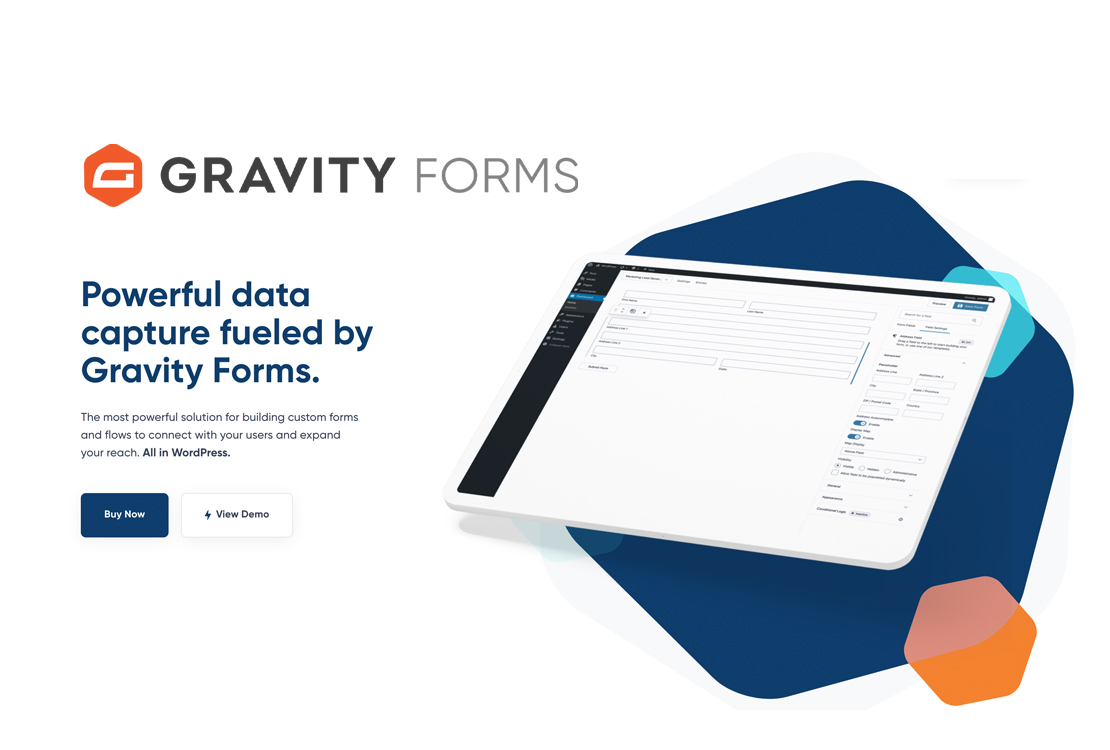
Top websites and major brands use the effective forms plugin Gravity Forms to build forms on WordPress. The only structural tool you will ever require is Gravity Forms. WordPress structures may be created and distributed in a matter of minutes. Just quick and easy structure building, no drudgery. Using the built-in tools, choose your fields, organize your options, and successfully install structures on your WordPress-powered website. With the help of this module, you may create your own unique Gravity Forms structures and send data to Drip whenever a form is submitted. It is a WordPress plugin that was initially used to generate contact forms, but in a broader sense, it enables website owners to develop forms to gather data. It may be used for employment applications, calculators, WordPress posts, contact forms, and more. A tool in a tech stack’s Web Forms category is called Gravity Forms. Top websites and major brands use the effective forms plugin Gravity Forms to build forms on WordPress. It is a versatile and powerful WordPress plugin. They maintain a minimal feature list here, but the library of help files and user manuals has much more information. Additionally, if you have questions about a product’s capabilities, their customer support team is always accessible to try to assist you. Check out the Add-ons for additional features, which offer a variety of ways to enhance Gravity Forms or communicate with other well-known services. Don’t forget to check the third-party add-on library or other popular repositories for add-ons created by third parties to work with Gravity Forms as they also offer a rich development API. It’s possible that someone else has already created what you’re thinking about! If the feature you want isn’t included in the base software or any add-ons, but you have some programming experience, you might be able to create it yourself.
OVERVIEW
A WordPress plugin called Gravity Forms enables site owners, administrators, and developers to create simple and sophisticated forms to gather data on their WordPress websites, and then determine what to do with it. Use Gravity Forms to create contact forms, calculators, job applications, WordPress posts, and more. For a sample of some of the things, you can accomplish, have a look at this library of available templates. Additionally, you can combine your form submissions with various external services by using one of their many official add-ons (such as Stripe, PayPal, Square, Zapier, or MailChimp). Here is a complete list of authorized add-ons. Additionally, designers provide a large selection of WordPress hooks and a feature-rich API to let developers alter and expand the functionality they offer and to let third parties create a large number of extensions to the core functionality. For an example of what is available, see their developer documentation and their collection of Gravity Forms-compatible third-party add-ons. Gravity Forms’ form builder is powered by several WordPress built-in functions and features and is written in PHP. Although it makes use of the same MySQL database as WordPress, it saves all forms and submissions in separate tables. Open source and GPL-licensed, Gravity Forms. The entire provided code is not encrypted. The most feature-rich WordPress contact form module currently available is Gravity Forms. Gravity Forms includes everything you’ll need to quickly create an online structure, from responsive structures to spam channels and advanced estimations to payment entryways. Gravity Forms is your BEST choice if you have the money to invest in a premium WordPress structure module. Obviously, it’s a bit pricey, but if you’re sick of looking for a complete structure module, look no further than Gravity Forms.
HOW DO GRAVITY FORMS WORK?
Using gravity forms is fairly easy. Start by clicking the download button on the Gravity Forms account page to get the plugin ZIP file. After logging in, go to the Plugins section of the left-side menu in your WordPress admin dashboard and choose Add New. Select Upload Plugin, then click Choose File. To finish the procedure, locate the Gravity Forms plugin ZIP file, pick it, and click Install Now. Gravity Forms will now be installed on your website automatically! When the installation is finished, choose Activate Plugin. For access to updates and support, the final step is to activate your plugin license. Let’s take a look at the entire procedure of gravity forms.
STEP 1: Download the gravity forms
After you’ve paid for an annual Gravity Forms license, the plugin will be accessible for download as an a.zip file. You should save the This.zip file to your desktop.
STEP 2:The Gravity Forms plugin must be uploaded to WordPress in step two.
The WordPress dashboard’s Plugins > Add New option is selected. On your computer, find the Gravity Forms.zip file, then click Upload Plugin to upload it.
STEP 3:
Install and activate the plugin in step three.
Following the.zip file’s upload, select Install Now then Activate Plugin.
STEP 4:Insert the license key in step four.
You get a license key when you buy Gravity Forms, which entitles you to all of the plugin’s features, including support, automatic updates, and add-ons. To find your license key, log into your Gravity Forms account and select Your Licenses.Then, head back to your WordPress dashboard after copying the licence key. Select Settings from the dashboard’s Forms menu. Paste your key in the Support License Key field on the General Settings tab. At the bottom of the page, select Save Settings.
STEP 5: Configure the plugin’s default parameters.
After your key has been verified, you can configure several common plugin settings on the same page. These choices include error logging, automated background updates, and the chosen currency for payments. Automatic background updates ensure that your Gravity Forms installation is the most recent, secure version, which makes them useful. After making the necessary adjustments, click Save Settings at the bottom of the page.
STEP 6: Create a form.
Once the plugin has been successfully installed and your configuration choices have been made, you are ready to construct your first form. On your dashboard, choose Forms and then New Form. You will then be taken to the form editor, where you may create the form you want using the drag-and-drop builder, fields, and customization options. From here, you can give your form a title and an optional description.
Step 7: Publish your form
Once everything is complete, you can post your first form on your website. On your WordPress dashboard, click the Pages menu and select Add New or an Existing Page. Above the visual editor in the page editor is the Add Form button. When you click on this button, a drop-down menu containing all of your forms appears. After selecting the freshly created form, click Insert Form. Gravity Forms form fields can be adjusted to create a variety of forms. The Gravity Forms WordPress form plugin divides its fields into four primary groups.
Standard Fields: Basic form fields that can be used and modified and can be used in any form. Some of the fields in this category include Single Line Text, Paragraph Text, Drop Down, Multi Select, Hidden, HTML, Section Break, and Page Break.
Post Fields: WordPress post fields are form fields that you may use to gather data. These fields include Post Body, Post Category, Post Image, and Post Custom Field.
Fields for Products: To create products, use the Product, Option, Quantity, Shipping, and Total fields in Gravity Forms.
Advanced Fields: A more sophisticated sort of form field created with a specific application in mind. These fields include Name, Date, Time, Phone, Address, Website, Email, File Upload, CAPTCHA, and List.
HOW TO INSTALL GRAVITY FORMS
The procedure for installing Gravity Forms is really simple and easy and is the same as for installing many other plugins. The easy installation of Gravity Forms using the plugin uploader in your WordPress admin panel is demonstrated in this article. If your website is hosted by WordPress.com, you can only install Gravity Forms if you have the Hello Dolly plugin installed, are subscribed to their Business plan, and have a custom domain set up. The steps listed below can then be used to install Gravity Forms via the /wp-admin/ dashboard.
Using the dashboard for WordPress
- Once Gravity Forms has been downloaded, go to the plugins tab and select Add New.
- At the top left of the screen, select Upload Now.
- Drag the downloaded file and drop it on the Choose File button.
- Once you complete the remaining instructions, Gravity Forms will successfully download.
With FTP
- Download Gravity Forms first. To do this, all you have to do is go to the Gravity Forms download page, sign in, and download the plugin zip file.
- You must unzip the zip file you downloaded because you are installing via FTP.
- After that, use FTP to access your WordPress website and go to the wp content/plugins directory. Upload the full “gravityforms” folder that you acquired after unzipping the zip file inside of there.
- Once everything has been fully uploaded, go to the WordPress admin dashboard and select Plugins. You should now see a Gravity Forms entry on this page. All that is left to do is click the Activate Plugin button.
- I’m done now! Your WordPress website is now functioning with Gravity Forms installed. You may now begin by following our setup instructions for Gravity Forms.
How to Create your First Gravity Form
After installing and turning on Gravity Forms, you can construct your first form by following the instructions listed below. Advanced and complicated businesses, such as services, quizzes, and eCommerce forms, can be easily created.
- Go to forms and select “add new.” A popup window will appear and ask you for the form’s title and description. After adding these details, select Create Form from the menu.
- The form editor will now be displayed to you, with all the fields on the right side and the actual form space on the left. The necessary fields can be added by dragging them into the form area.
- Once all of the fields have been added, click Update, and your form will be saved. By selecting the Preview link in the top menu toolbar, the form can be seen in advance.
- Go to the page or post where you want to add the form, then click the Add Form button that is above the rich text editor next to Add Media.
- You will see a drop-down list of all the forms you have generated here, along with options to display the form’s title and description and enable ajax submissions.
- Click Add Form to continue, then publish the page.
Configuring Gravity Forms’ Notifications
How Do Notifications Work?
An email message that a form has been successfully submitted can be quite helpful for the website administrator when a user submits one. You won’t need to continually check your Entries table to see whether anything has been entered thanks to this. This post will demonstrate how to set up a simple and easy email notification for one of your forms. You can have several notifications for a single form, and even for a single submission, as your needs change. Additionally, you can use intricate conditional logic rules to specify which is triggered upon submission. To start, however, let’s just make a simple notification.
Create a New Notification
- You must already have a form in place. You can read our post on constructing forms if you need to learn how to accomplish it.
- Get to the form for which you want to make the notification first. To do this, select Forms from the navigation menu on the left, then pick the form you want to use.
- Hover over Form Settings in the top menu and select Notifications.
- A list of all available alerts for that form should now appear. Within your WordPress installation, there ought to already be a single notification that sends the submissions to the admin email account by default.
- You can order the list alphabetically by selecting the “Name” header. Click the Add New button to add a new notification
- Choose a name for your notification first. This is merely a means of making the notification clear. Any original name will do.
Adding A Form To Your Site
This documentation area contains links to articles that describe the main techniques for including forms on websites. To incorporate your form, you will need a page or a post, but once you have them, all the typical WordPress embedding options are available. Pick the option with which you are most at ease.
Use option 1, the Embed Form button, for the greatest results!
You can quickly and easily add a form to an existing post or page by using the helpful Embed Form button. (Gravity Forms 2.6 or more recent)Learn how to create a form in WordPress 5 and later by using the Gravity Forms block.
Inserting a Form Using a Theme File or Hooks – For more experienced users, you can make use of a function call inside the theme file of your website. Check out our collection of beginning templates in our library or import an existing form template.
Using the Add Form button or typing the shortcode by hand in the old editor, you can create a form (for those using WordPress 4.9 or less, or still working in the classic WP editor).
FEATURES
One of the simplest and clearest interfaces for building dynamic forms and handling form data is provided by Gravity Forms. Gravity Forms’ primary function is form creation, and other features are centered around it to maximize its potential. Let’s take a closer look at Gravity Types’ key characteristics.
- Dynamic type creation with innovative fields
Create simple contact forms with guidance validation by just a few text fields and text areas. This plugin’s type builder offers a thorough range of topics divided into four areas called Standard, Advanced, Post, and Pricing.
- Field sorting with drag and drop
The majority of plugins use an interface that requires you to provide numeric numbers to give value order. Gravity Types facilitate this by enabling straightforward drag-and-drop arrangement of the type fields.
- Fully functional form setup and validation interface
Every form area’s configurations and validation can be changed through the interface. When necessary, you can decide whether to use the current validation rules or create your own.
- Engage your audience
Forms are a crucial factor to take into account when developing your WordPress website to gain your visitors’ confidence and promote to them effectively. Investing in a high-quality plugin will ensure that your data collection is efficient and user-friendly. This is why we suggest Gravity Forms, a potent plugin that will upgrade your forms. It allows you to completely customize each form, including who receives the responses, who the user sees, and what they can submit. Whether you require straightforward contact forms, email sign-ups, or even have sales in mind,
- Email forwarding
Gravity Forms can deliver entries to designated coworkers based on the information filled out in the structure as visitors start filling up your structures. Let’s say you own a company that prepares pets, and every one of your salespeople has some experience with a different type of animal. You may provide a structure that allows curious customers to select the size of the animal that has to be prepared (e.g., canine, feline, here). Customers who choose “bunny” will have their accommodations delivered to the email address of the employee who has experience raising pet rabbits. Your proposal might not be as endearing but it would still make sense.
- Restrictive Logic
The ability of Restrictive Logic Gravity Forms’ dependent designing to reveal or conceal explicit fields based on a client’s response to the selection of a particular field in the structure may be its most well-known feature. For instance, if a field asks, “Do you have a pet with you?,” and the customer selects “Yes,” a second question appears prompting the customer to select from a list of the kind of pets they possess. In the unlikely event that the customer selects “No,” the rundown field remains hidden.
- Installment
You can incorporate estimating fields to acknowledge installments in Gravity Forms, which is another popular feature. Due to Gravity Forms’ integration with PayPal, you can easily and securely collect payments from your structure.
- Information Export
Sending from data as an Excel accounting page is another option if you need to save structural reactions. If you are collecting data from your structures over a prolonged period, this is especially practical. Gravity Forms also provides conversion analytics, allowing you to quickly compare the number of entries you are receiving to the number of people viewing the structure to make adjustments and increase sales.
- Add-Ons
Additionally, Gravity Forms has several add-ons that you can incorporate into your forms. When subscribing to the $159 Pro License, you can integrate email marketing services like MailChimp, GetResponse, AWeber, and many more if you’re building an email subscription list. ConvertKit, for example, offers a free plugin, so be sure to examine what else is out there first. They also feature more sophisticated plug-ins, such as Slack, Fresh Books, Dropbox, and many others. Importantly, they also permit PayPal’s integration, which is incredibly beneficial for gathering orders and taking payments.
- Third-Party Gravity Forms Add-Ons
In addition to the official Gravity Forms add-ons, there are numerous third-party extensions available. One plugin that enables you to find code snippets that enhance the plugin is Gravity Perks. Gravity View is another interesting add-on that enhances the plugin’s capacity to publish form entries on your WordPress website, making it perfect for accepting guest pieces or reviews. A third-party add-on for generating PDFs from form submissions is also available, which may come in handy if you need to generate invoices, contracts, or other documents utilizing form data. The WordPress Plugin Directory also offers free Gravity Forms add-ons.
- Confirmations
Numerous confirmation alternatives are available. You have the option to display text, browse to a certain page, or give a URL to redirect to. One distinguishing aspect of all the available options is the ability to pass form data, either as text or as a query string parameter. As an illustration, the majority of the forms on this site redirect to a page with the query string parameter “name,” and I make use of a plugin called URL Params that enables you to display the parameter value on the page.
- Conditional Logic
One of the most effective WordPress form solutions is Gravity Forms, which has a conditional logic feature. Based on the values supplied in earlier fields, conditional logic can choose which form fields users see. with the aid of conditional logic. Additionally, you can enable advanced form entry routing. assisting in making sure messages are delivered to the appropriate team member or department, depending on the information on the form.
- Export and Import
As we must constantly back up all the data, this is one of the most important qualities in any plugin. We are allowed to export both form areas and form entries as XML documents. Additionally, it offers the option to export data quickly by uploading the generated XML files.
- Gravity forms make entry management simple
By storing all form submissions as entries. Entries can be viewed by form. You may find it under Forms -> Entries. You can choose the form for which you want to view all the entries from here. From this page, entries can be viewed, modified, flagged as spam, or redirected to the trash. Having entries is particularly beneficial because email notifications cannot be trusted if you’re using WordPress’ built-in PHP mail function (which all form builders use unless you have configured SMTP). If the hosting company’s emails are never delivered, you can miss some notices. You may check all the contributions from a single location in your WordPress installation’s backend while using entries.
- Multi Measure Types
This is how extensive forms are handled in modern times. Users typically find it far more comfortable to fill out forms section by section rather than reading through lengthy forms. Using its page break element from the conventional fields segment, Gravity Types makes it simple to divide your form into multiple measures.
- Require users to be logged in:
You have the option of restricting your form to users who are logged in only, and if a user is not logged in, you can set a custom message for them. The good news is that you can use HTML to add links to your login message that can direct users to your website’s registration or login page. Additionally, Gravity Forms offers an official addon for user registration that may be used to design unique user registration forms.
- Holding an online competition
In addition to the standard form creation capabilities, Gravity Forms may be used in a variety of unique ways. The use of Gravity Forms as a contact type generator plugin will be demonstrated in the bulk of the articles or tutorials. Today, I’d want to take a slightly different approach by using this fantastic plugin to build an online competition and highlight its best features.
- Creating the form
Fundamentally, they require the consumer’s name, email address, and remarks about the plugin. Create an online contest as a new form. Then click the Insert Paragraph text area button under the regular Fields section. Your form should now appear somewhat like the following display.
- Limit on Submissions:
You can set limitations on your form, such as a limit on the number of entries that may be submitted. The number of entries may be restricted by day, week, month, year, or overall submissions. To let people know when the entry limit has been surpassed, you can display a personalized message.
- Using reCaptcha, combat spam on WordPress contact forms
Spam emails hurt your website and pose a real danger. Any link you click in a spam email could allow hackers access to your website. If you don’t have any safeguards in place, contact forms are a wonderful way for these spammers to exploit you. if you want to keep their inboxes free of unwanted mail. With options for Google reCaptcha, Simple Captcha, and Akismet, Gravity Forms aids in the fight against spam. To activate reCaptcha on your form, use the captcha form field.
Gravity Forms Add-Ons for Free
Here are some of the well-liked, no-cost Gravity Forms plugins that we keep up on WordPress.org.
Gravity Forms Zero Spam Can Help You Get Rid Of Submission Spam
Even though Gravity Forms supports Google reCAPTCHA and has a honeypot field created to catch spam submissions, those annoying bots occasionally manage to fill your mailbox with useless emails. Because of this, we still support the free Gravity Forms Zero Spam plugin. The plugin doesn’t use CAPTCHAs or any other intrusive spam-prevention techniques that only serve to degrade the user experience. Instead, the plugin makes use of a modified version of David Walsh’s comment form code, which makes it simple to spot spam comments by adding an invisible field that only bots can see to your forms. This is the only method that can completely get rid of Gravity Forms spam, according to several users. In actuality, the plugin has more than 50,000 active installations right now!
With GravityExport Lite, you can export data to Excel for free.
GravityExport is a GravityExport add-on. With the Lite edition, you may use a safe and shareable download URL to export your form entries straight to Excel (.xlsx).
Additionally, as you add new information, your reports will update automatically. You don’t need to log in to receive the data. One of their most used free Gravity Forms products, the plugin presently has over 10,000 active installs.
GRAVITY FORMS ALTERNATIVES
The alternatives of Gravity Forms over other free and paid form plugins
Contact form 7: In the WordPress ecosystem, Contact Form 7 has arguably seen the greatest usage of any free form plugin. When it comes to forming builders, third-party extensions, and sophisticated capabilities like eCommerce forms, it falls short of gravity form.
Ninja Forms: Ninja Forms just released version 3.0 of the plug-in, which entirely broke functionality with several of their in-house as well as third-party extensions. Numerous add-ons still need to be updated in order to work with the most recent Ninja Forms version as of the time this article was being written. As a result, they are not as reliable as gravity forms. Due to the lack of developer documentation for Ninja Forms, compared to Gravity Forms, there are also significantly fewer third-party add-ons available.
WPForms
One of the newest form builder plugins that have been widely used by users is WPForms. Because of this, there are significantly fewer official and third-party add-ons available for Gravity Forms. Additionally, they lack developer documentation, making it challenging for developers to add new functionality should you require it. Other than that, Gravity Forms has some stiff competition from this.
Formidable Forms
Inbuilt form styler, views, and front-end entry editing are just a few of the features offered by Formidable Forms, which is a form builder plugin. They aren’t used as frequently as gravity forms, though. Its user base is less vibrant than that of Gravity Forms.
PROS
- Forms are a great tool for every website, regardless of the type.
They’re a quick and effective way to increase your email list of subscribers, get user feedback, make it easier for customers to contact you, and more. Selecting a good form-builder plugin is the first step to using them successfully in WordPress. For instance, Gravity Forms offers a sizable library of third-party Add-Ons in addition to thirty ready-to-use form fields. With the help of these capabilities, you can quickly and easily design custom forms that are ideal for your website.
- Different Forms and the Interface
Gravity Forms offers a fantastic drag-and-drop form builder interface that makes complicated tasks simple. The forms’ actual layout and appearance are undoubtedly considerably sleeker and cleaner than forms created using alternative builders, lending your website a more polished appearance. It contains 33 different form fields, allowing you to create essentially any kind of form, including surveys, tests, help requests, online orders, email sign-up forms, and much more!
- Use Conditional Logic to Create Advanced Contact Forms
Gravity Forms contains additional pre-built fields in addition to the typical contact form fields like the user’s name, email address, and message to make it simple to request further information. This can assist you in efficiently and effectively communicating with users. Additionally, the plugin’s base version has features that let you create more dynamic forms. The Conditional Logic option is the ideal illustration. You can do this to create custom parameters that will only allow certain fields and pieces of information to appear under certain conditions. You could, for instance, ask users which means of communication they prefer, and then display several fields according to their choice. If they select “email” as their preferred means of communication, you can give them options where they can verify their address. In contrast, if they select “phone,” your form may show one or more pertinent fields for that data. With this feature, you can streamline your contact forms so that they only contain the fields that are pertinent to a given user. Fields, notifications, confirmations, feeds, and more can all be dynamically displayed or concealed. Gravity Forms also makes it very easy to set up Conditional Logic.
- Email notifications:
The email alert system for gravity forms is fairly adaptable. With conditional logic, you may set up several email alerts for form submissions. Depending on the information the user submitted in the form, different people will receive notifications this way. Imagine that you run a web development company and that the contact us form offers the choice between a sales, technical, and general inquiry. The appropriate department (sales, technical, or general), not all of these departments, should then receive the email notifications. The conditional logic of Gravity Forms notifications can be used to do this.
- Simple Subscription Forms Can Help You Grow Your Mailing List.
You may add fields to your mailing list for subscription forms created with Gravity Forms to determine what information your subscribers are most interested in receiving. By doing this, you can be certain that the users are receiving information that is pertinent to them: By asking your audience how frequently they want emails, you may also avoid losing subscriptions and annoying them. The pre-built email field in Gravity Forms features a CAPTCHA feature that is ready to use to assist prevent spam and an option to enable email confirmations. You can also link your subscription forms to a top-notch email marketing platform with the MailChimp Add-On. You can concentrate on keeping your website in great condition while your email campaign almost runs itself by automating the subscription process.
- Include Coupons on Special Order Forms
Producing order forms for your products only requires a few button clicks thanks to Gravity Forms’ pre-built order form fields, which include Product, Quantity, Shipping, and Total. Additionally, you may provide discounts directly in the form by using the Coupons Add-On that is a part of our Elite plan: You don’t have to be concerned about mistakenly over-discounting because you have total control over the coupons’ usage restrictions. Even better, coupons can be made available for use on any form with a coupon field or set up to only apply to particular forms.
- Partially Save Form to Continue Later
Users could lose interest in completing a lengthy form or switch to another task while submitting one. Gravity Forms save and continue later function will come to your aid in this circumstance. Your users can store a form that is only partially filled out and come back to it later to finish it. With the appropriate WordPress contact form plugin, it’s that easy.
- Allow Registrations from Users to Expand Your Membership Base
The most fundamental components of your registration form may be added in just a few seconds thanks to their User Registration Add-pre-built On’s Username and Password fields: In order to stop bot accounts, you may also include a CAPTCHA. Additionally, you can prevent users from inputting bogus email addresses by requiring email confirmation. Additionally, the User Registration Add-On incorporates BuddyPress and PayPal for simple user payments and social networking on your website. Even better, you can make sure no user accounts are created before funds have been accepted.
- Limit on entries:
You have the option to include restrictions in your form, such as a cap on the number of entries that may be submitted. Entries may be capped at a certain number per day, per week, per month, per year, or overall. You can also display a custom message to notify users when the entry limit is reached
- Generate Polls to Engage Users
You may create unique polls with the Polls Add-On, then show the results for users to see and share on your website. You can also choose to keep the results confidential and use them however you choose to improve your website. To make your polls more effective, you can use conditional logic to randomize the order of the response options, make them compulsory for submission, or arrange them in a particular order. You’ll also save time while sorting through the results if you design polls that stop asking questions after they have all the data they need.
- Share Fun Quizzes to Promote Your Website
For your users, you can create personalized multiple-choice quizzes by using the Gravity Forms Quiz Add-On. Your quizzes’ scoring will be under your control, and as respondents submit their responses, the results are available immediately: Your answer choices can be shown using drop-downs, radio buttons, or checkboxes, and you can set them up to appear in a different order every time someone takes the quiz. Additionally, adding explanations can provide your users with more information about why their responses were correct or incorrect.
- Distribute questionnaires to gather feedback
Similar to polls, surveys are a quick way to get customer feedback so you can improve your website. You can make sure that the improvements you’re making to your site will enhance your audience’s experience by utilizing our Survey Add-On to find out what they want to see: The Gravity Survey Add-On Forms can display response options in a variety of ways, such as checkboxes, drop-down menus, ranks, ratings, and more. You can select the presentation that best answers your inquiries. You can collect and filter user responses after they’ve been submitted so you can better understand the outcomes: You can show and arrange the results in a variety of ways to better understand the opinions of your users: You can rapidly determine how your consumers feel about your website, services, or products by collecting accurate data, and you can then make changes to enhance their experience.
- Encourage user content creation through post-submission forms
You can add post-submission forms to the front end of your site with our Advanced Post Creation Add-On. This allows users to contribute content while also allowing you to review user-generated pieces before they are published on your website. This improves engagement while ensuring that user-submitted content is of the highest caliber and consistent with your vision. Additionally, you’ll contribute more long-form material to your website with no work on your part. Having users submit content directly increases the security of your website. You won’t have to worry about users accidentally destroying anything or posting subpar posts without your permission because they won’t need access to the back end to create material.
- Let Customers Make Secure Payments on Your Order Forms
Not least among other things, you may make sure that your consumers can use their preferred payment processors directly on your purchase form. The Stripe and PayPal Add-Ons for Gravity Forms make this feasible. To accommodate the different demands of your consumers, you can set up both gateways for one-time and recurring payments. Additionally, the Advanced Post Creation and User Registration Add-Ons are integrated with both of these payment methods. Users can register for accounts, make payments, and post updates all from the same form. Before the pertinent payments have been received, user accounts and postings won’t be created.
CONS OF GRAVITY FORMS
There are some drawbacks to gravity forms, including
NO FREE VERSION
Gravity Forms need to be paid for. The basic license costs $41, the pro license costs $111, and the elite license costs $181 annually. Some people consider the price to be a problem because it is too expensive.
COMPLICATED:
Users encounter difficulties navigating and comprehending how to construct forms. They contend that the process is difficult and that in order to understand it, they have to watch some videos or look for help.
THE PRICING OF GRAVITY FORMS
The Gravity Forms plugin’s cost includes a number of useful add-ons, features, and routine upgrades. Three different price tiers are available, and they are as follows:
Basic License: It costs $41 yearly and is only available for one website. Additionally, it has a range of add-ons, including Hubspot, Mailchimp, Active Campaign, and others, in addition to standard support.
Pro License: This license, which costs $111 per year, covers three websites. It provides both fundamental support and a number of powerful add-ons, such as Trello, Dropbox, Square, and Zapier, among others.
Elite License: It is available for an unlimited number of websites and costs $181 per year. It also has extras like user registration, polls, signatures, and priority support services, as well as coupons.
FAQ
Will my themes work on Gravity Forms?
All WordPress themes that are currently available may not be compatible with Gravity Forms. We can guarantee that Gravity Forms functions with the most recent themes from Automattic because they code Gravity Forms in accordance with WordPress best practices. Any theme that adheres to WordPress’s best practices ought to work. When using Gravity Forms with your theme, however, if there is a problem, they will ask you to activate a default WordPress theme (one of the Twenty themes) and check to see if the problem still exists. If it doesn’t, you’ll need to get in touch with the theme’s creator to troubleshoot.
Do gravity forms respond to input?
The designs created with this plugin will continue to work even if you change your theme. After using this Gravity Forms styler plugin, you won’t need another one. You can rapidly create responsive designs with a variety of font sizes, widths, line heights, and other elements for use on PCs, tablets, and mobile devices.
In CSS, how do you override gravity forms?
You can change all of Gravity Forms’ default styling by adding more specific styles to your theme’s CSS. If the Gravity Forms CSS “wins,” you must be much more explicit in your theme stylesheet if you want to change the default Gravity Forms styles.
How do I combine Gravity Forms and WordPress?
Select Add New by gliding over Plugins in the left-side navigation menu of your WordPress admin panel. On this window, select the Choose File option after clicking the Upload Plugin button. The next step is to locate the Gravity Forms zip file, select it, and select Install Now.
CONCLUSION
With the excellent plugin Gravity Forms, you can construct any type of form you can think of. You have complete control over how your forms operate thanks to the extensive settings and options, and if you select one of the more expensive plans, the add-ons offer lots of room for integration with services and products from other companies. The good news is that usability is not sacrificed in favor of these cutting-edge capabilities and settings. Using Gravity Forms is really simple. Form creation is simple with the drag-and-drop form builder, and settings and options are plainly shown. Another benefit of using the WordPress form plugin is the ecosystem of third-party extensions and add-ons that make up Gravity Forms. Should Gravity Forms be used for your website? Because of their form templates and simple settings and choices, the free Contact Form 7 or WPForms Lite plugins may be a better solution if you need a regular contact form. If you need more than just a simple and easy contact form, Gravity Forms is strongly discouraged. Comparing the characteristics of the top WordPress form plugins is still a smart idea to choose which one best suits your requirements. One of the most effective WordPress form plugins is Gravity Forms. Gravity Forms can be your best choice if you want to construct sophisticated forms. There are many WordPress form plugins available, however, Gravity Forms stands out among them all because of its functionality. It provides the ability to easily design any complicated contact forms. In this comprehensive evaluation of Gravity Forms, we’ve attempted to describe the features and capabilities of the software. If you want to update the forms on your website using WordPress, what plugin should you look for? Get Gravity Forms next, and start creating your forms right away.